Setting up UIKit programmatically with Swift
UIKit project set up with Swift and Programmatic UI in iOS 18.
Hi there! Most probably you will be thinking, why would I need to setup a new iOS project using UIKit when there is SwiftUI already?
Well, the thing is that UIKit is far from dead, and there’s a high chance you will encounter it in the wild. Here, we are gonna setup a pretty basic UIKit project built from scratch with Swift that will just show a UIViewController’s view background set to blue, using programmatic-ui instead of the default storyboard setup.
You can see a similar setup using Objective-C on this post.
Project set up
Go ahead and create a new project on XCode. Select iOS, App template, pick Storyboard as interface and Swift as programming language.
The project set up would look something like this

Build and run the project to check that everything works.
Storyboards cleanup
Now that everything is setup, we need to get rid of that dreaded Main.storyboard and setup our application to use programmatic UIKit.
Delete and move to the trash Main.storyboard.
With our Main.storyboard gone, it’s time to also remove its references within the project.
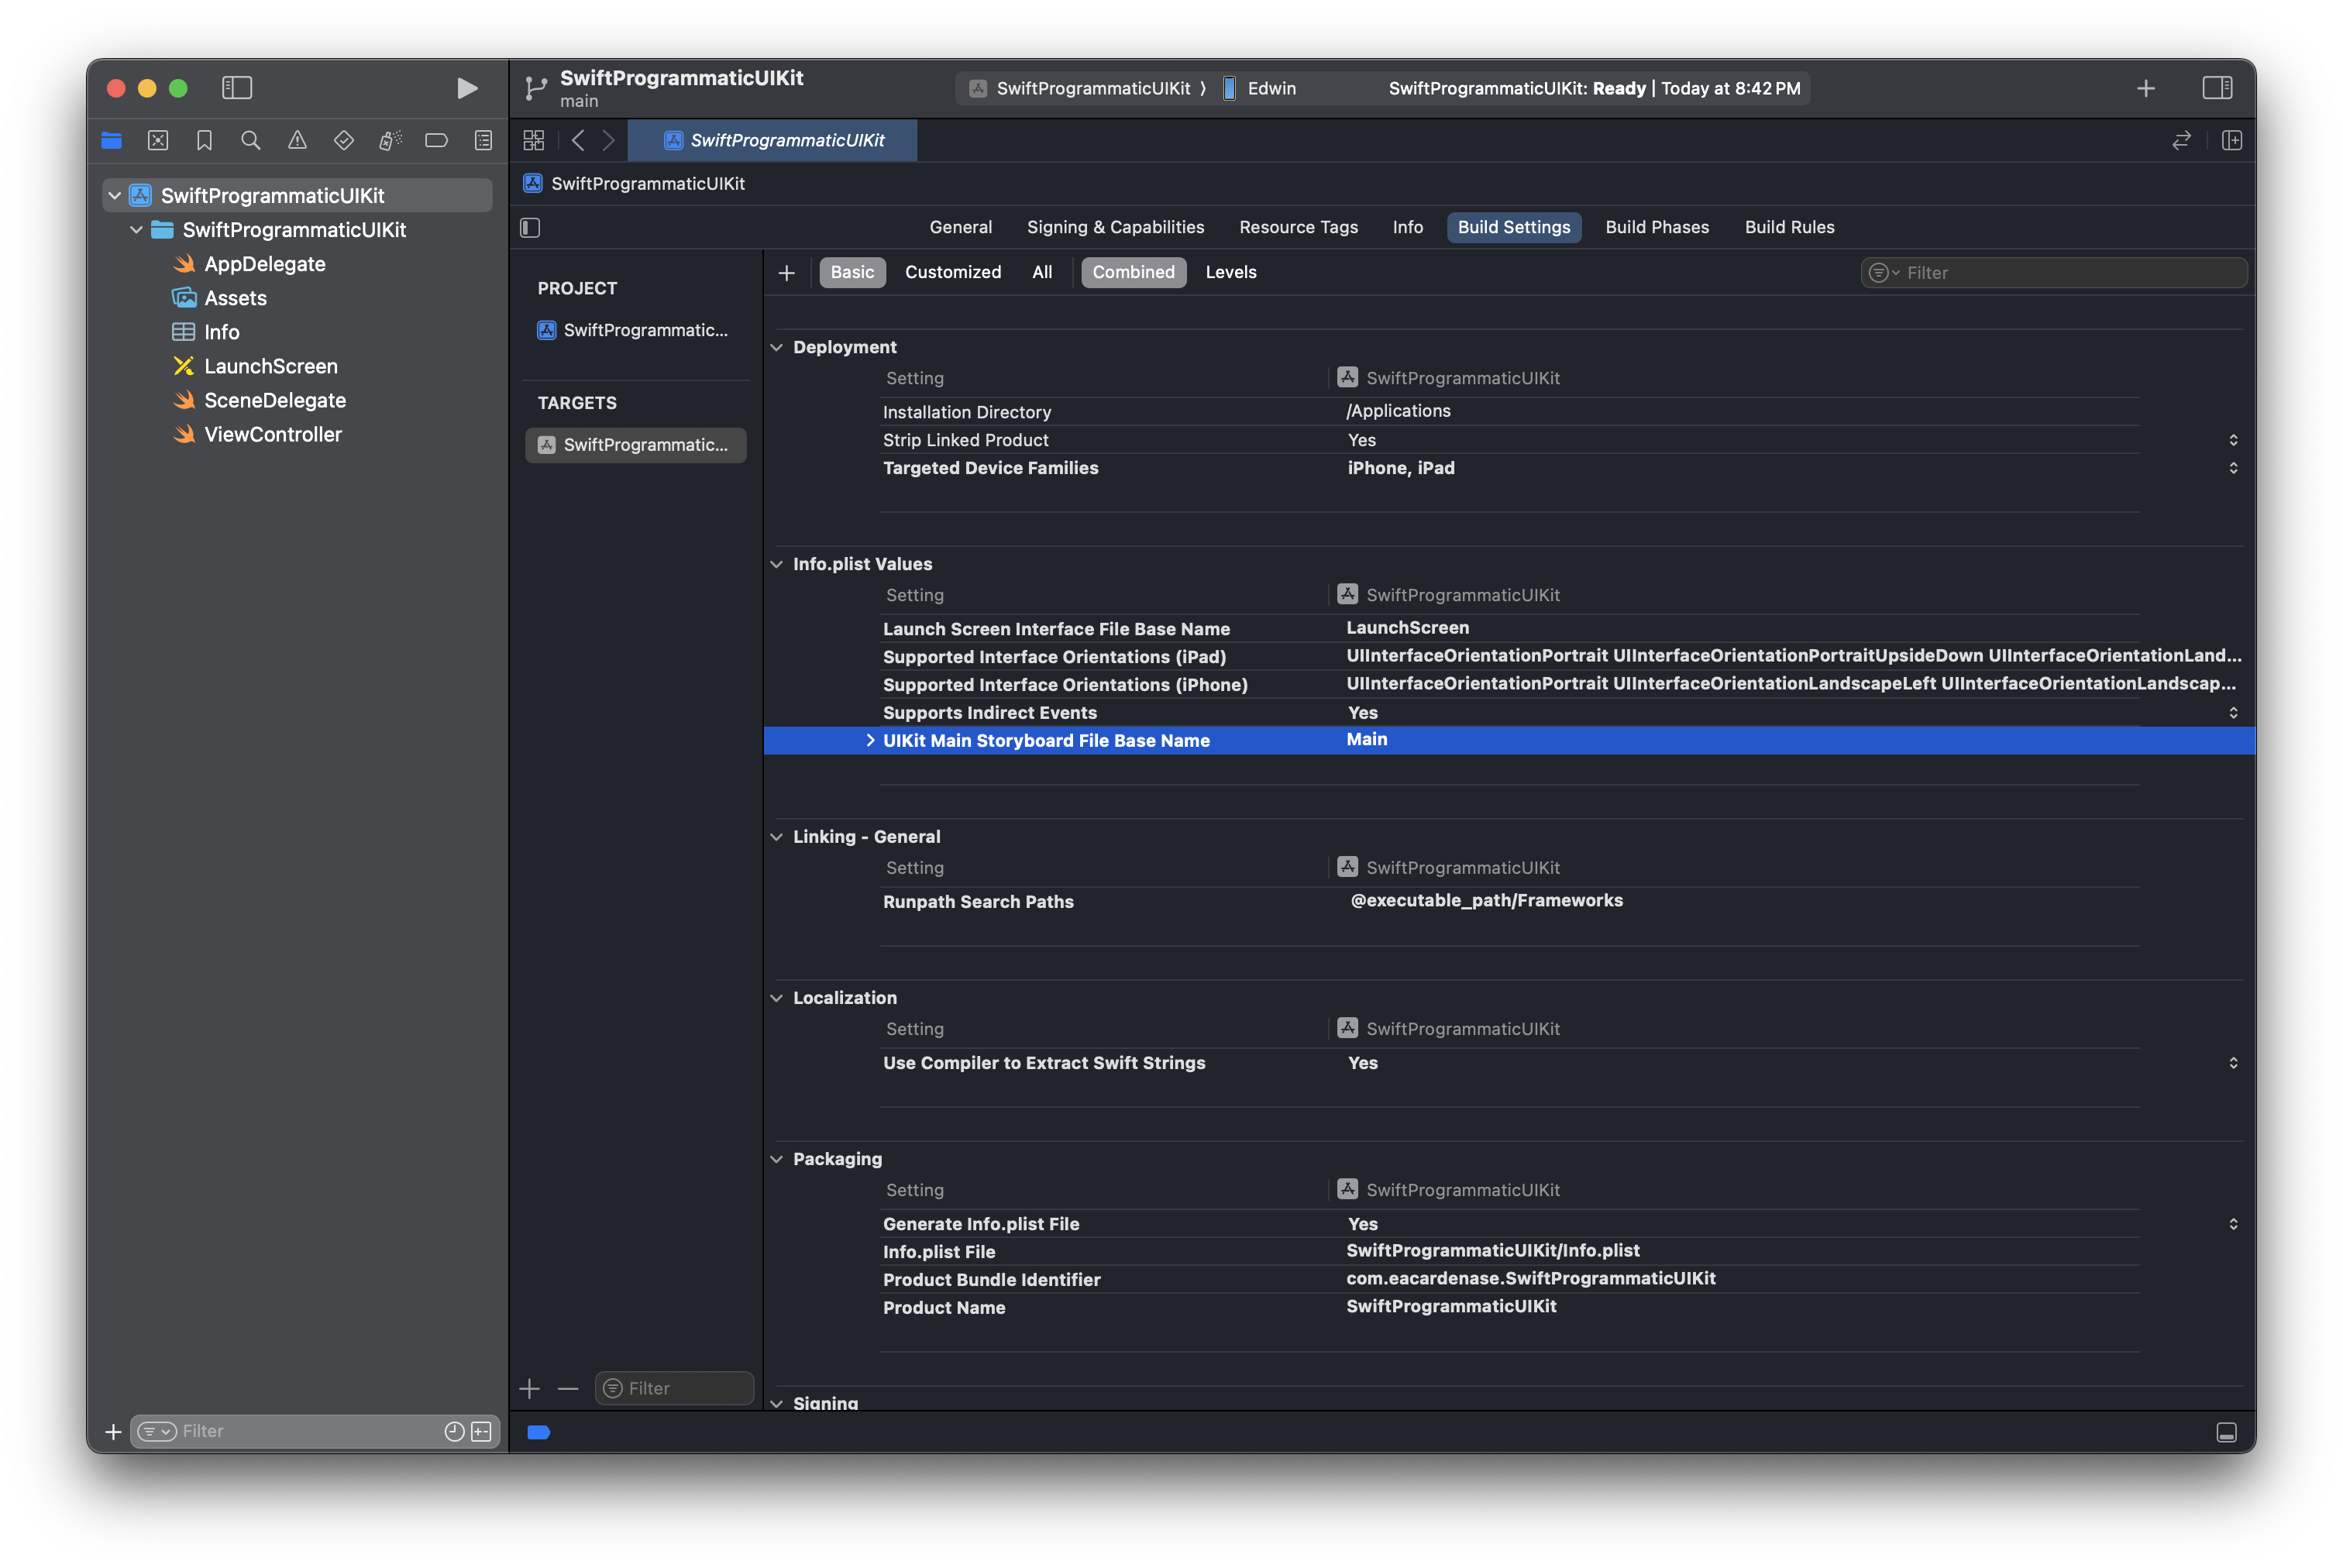
Select the project and go to the Build Settings. Under the Info.plist Values section, select and delete the property named UIKit Main Storyboard File Base Name, just like shown in the following image:
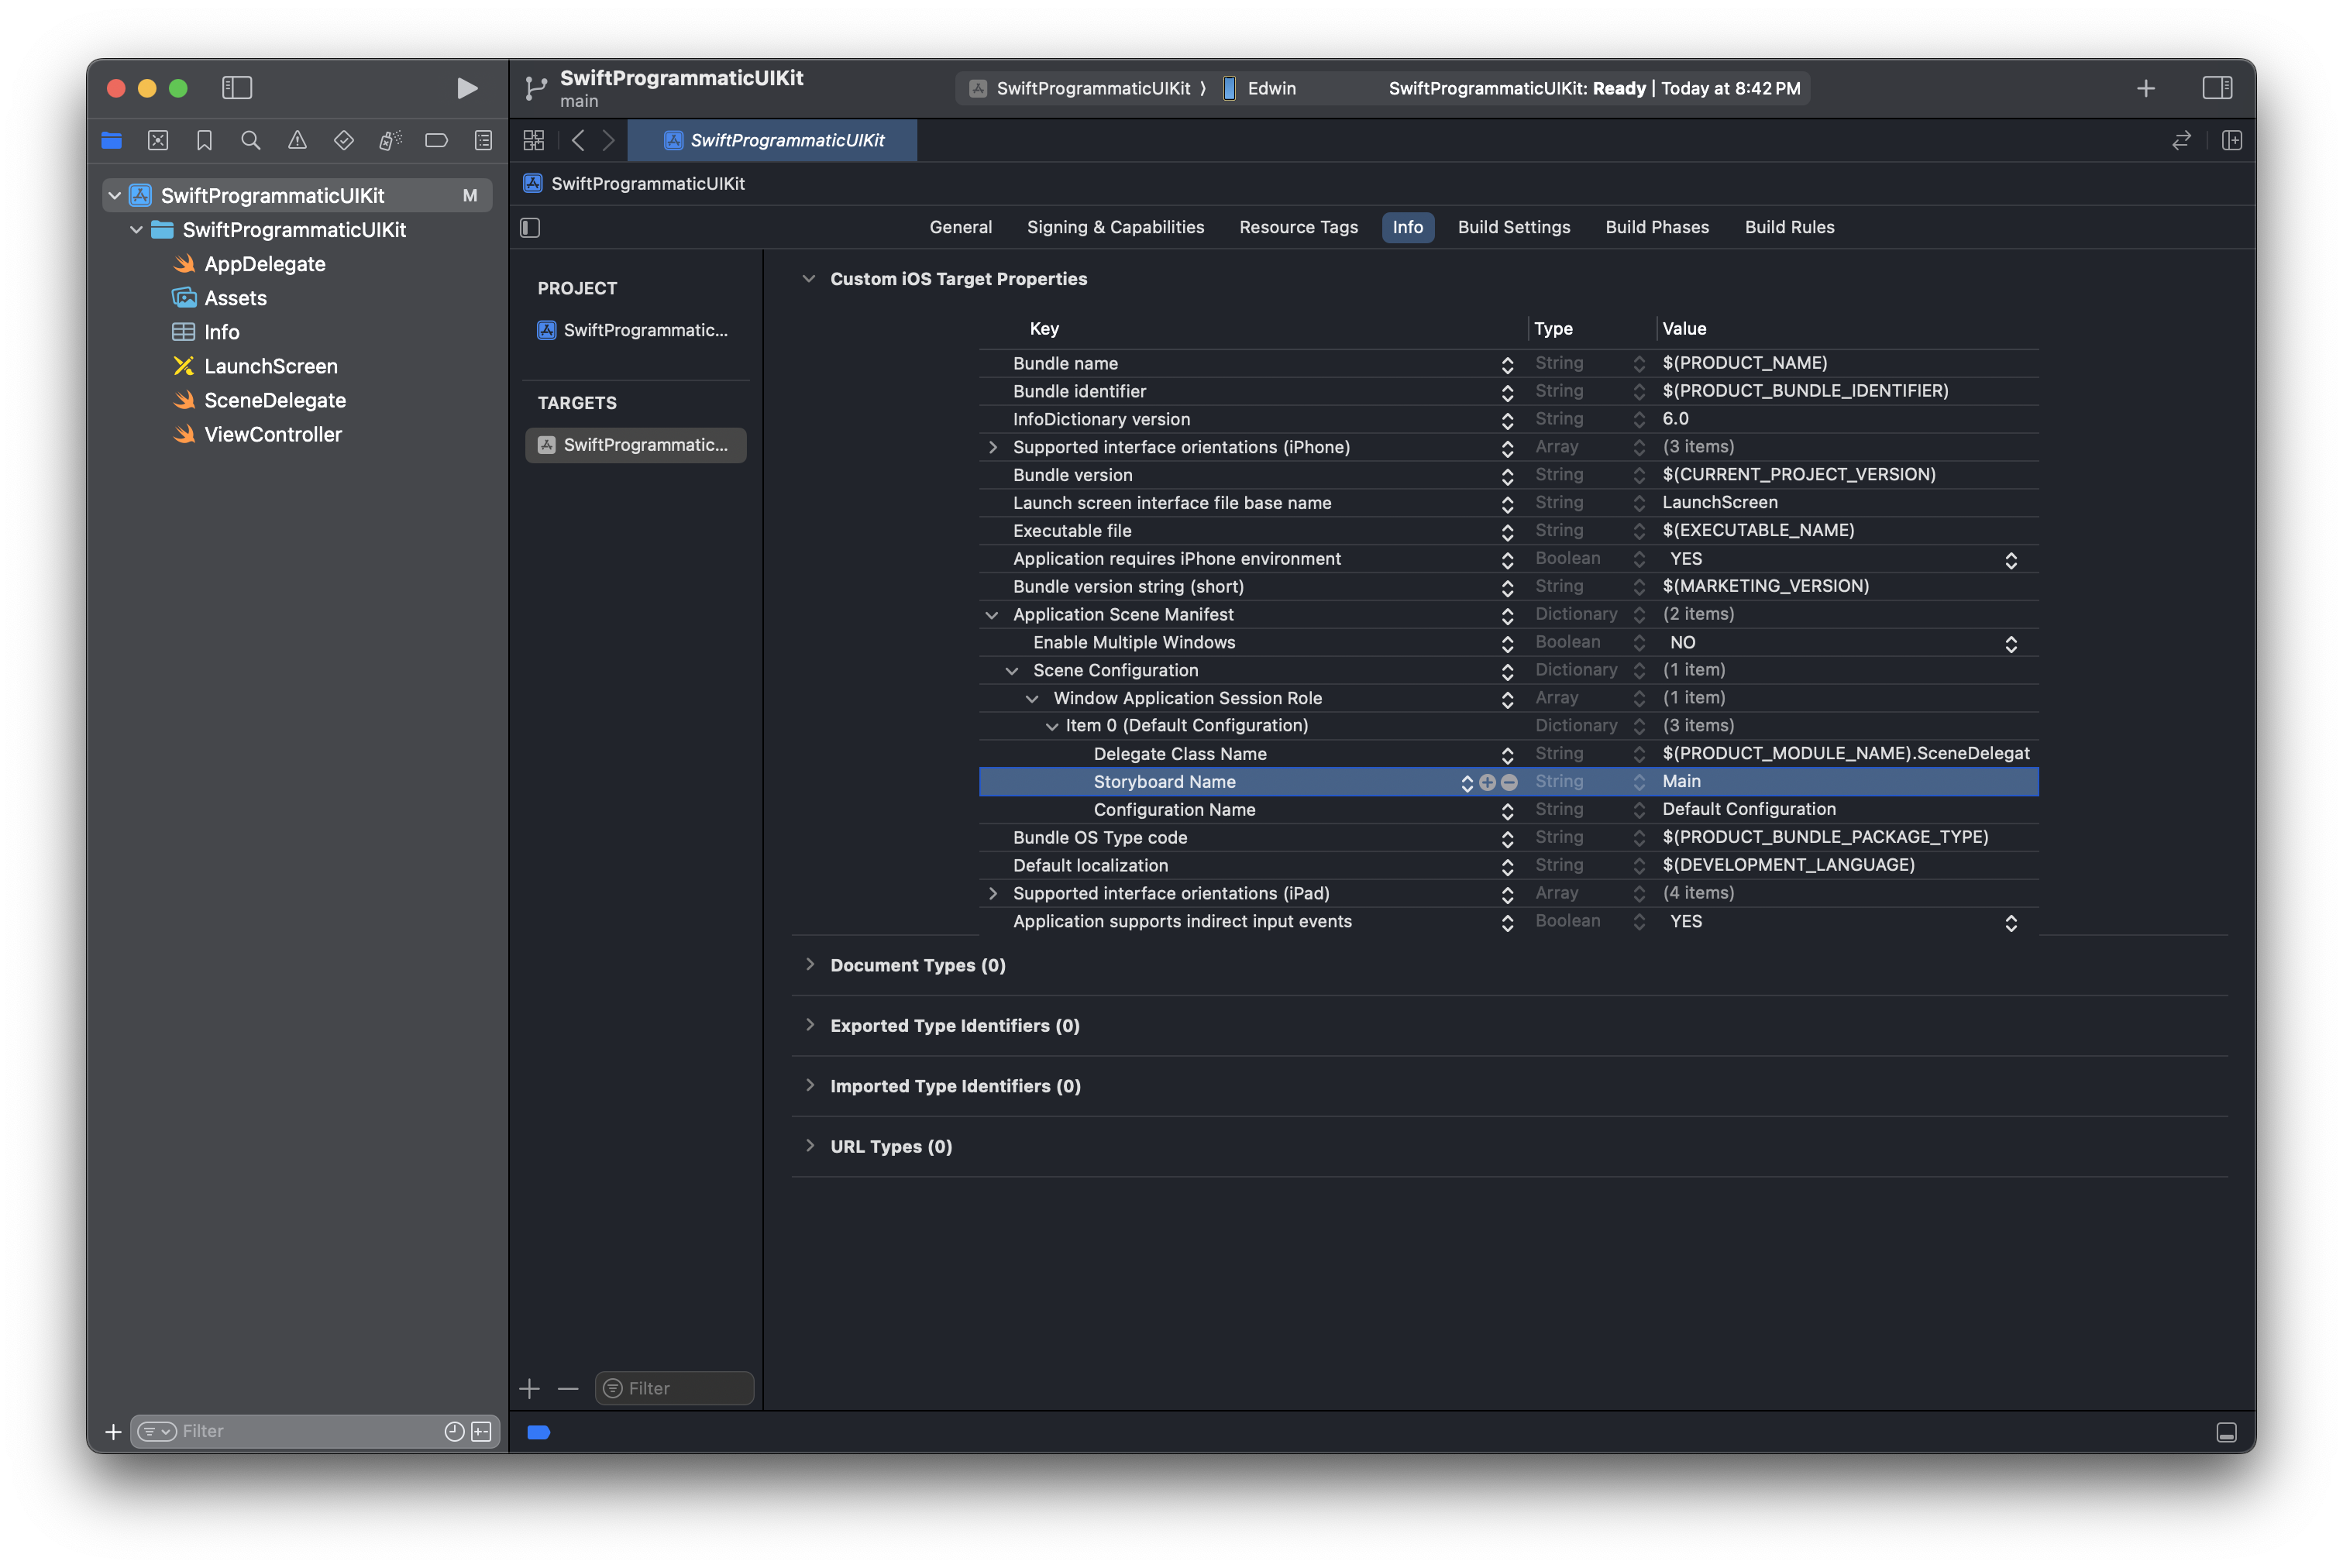
Next, we’re going to remove the reference to Main.storyboard from our Scene Configuration. Go to the Info tab just to the left of the previous Build Settings tab.
Under the Application Scene Manifest > Scene Configuration > Window Application Session Role > Item 0 (Default Configuration), select and delete the Storyboard Name property, as shown in the following image:
Programmatic-UI set up
Now that the Main.storyboard references are gone, it’s time to setup our programmatic UIKit setup.
Let’s start by setting the backgroundColor of our default ViewController’s view to UIColor.systemPurple within the viewDidLoad method. This will give us a visual guide and help us make sure that our changes work.
1
2
3
4
5
override func viewDidLoad() {
    super.viewDidLoad()

    view.backgroundColor = .systemPurple
}
Next, we’re going to update our SceneDelage scene:willConnectToSession:options method in order to set our an instance of our ViewController as the window’s rootViewController.
1
2
3
4
5
6
7
func scene(_ scene: UIScene, willConnectTo session: UISceneSession, options connectionOptions: UIScene.ConnectionOptions) {
    guard let scene = (scene as? UIWindowScene) else { return }

    window = UIWindow(windowScene: scene)
    window?.makeKeyAndVisible()
    window?.rootViewController = ViewController()
}
We just finished. Go ahead and run the project, you should see our beautiful displayed ViewController’s purple background in the simulator.
 UIViewController’s background color set to UIColor.systemPurple
If you want to take a deeper look, here’s the GitHub repository with everything we have covered so far.